Fuzzing libxml2 with AFL++
Before starting, build AFL++ LLVM mode and QEMU mode.
I assume that the path to AFL++ is ~/AFLplusplus, change it in the commands if your installation path is different.
Download the source of libxml2 with
$ git clone https://gitlab.gnome.org/GNOME/libxml2.git
$ cd libxml2
Now configure it disabling the shared libraries
$ ./autogen.sh
$ ./configure --enable-shared=no
If you want to enable the sanitizers, use the proper env var.
In this tutorial, we will enable ASan and UBSan.
$ export AFL_USE_UBSAN=1
$ export AFL_USE_ASAN=1
Build the library using the clang wrappers
$ make CC=~/AFLplusplus/afl-clang-fast CXX=~/AFLplusplus/afl-clang-fast++ LD=~/AFLplusplus/afl-clang-fast
When the job is completed, we start to fuzz libxml2 using the tool xmllint as harness and take some testcases from the test folder as initial seeds.
$ mkdir fuzz
$ cp xmllint fuzz/xmllint_cov

$ mkdir fuzz/in
$ cp test/*.xml fuzz/in/

$ cd fuzz
Make sure to configure your system with our script before start afl-fuzz
$ sudo ~/AFLplusplus/afl-system-config
Here we are!
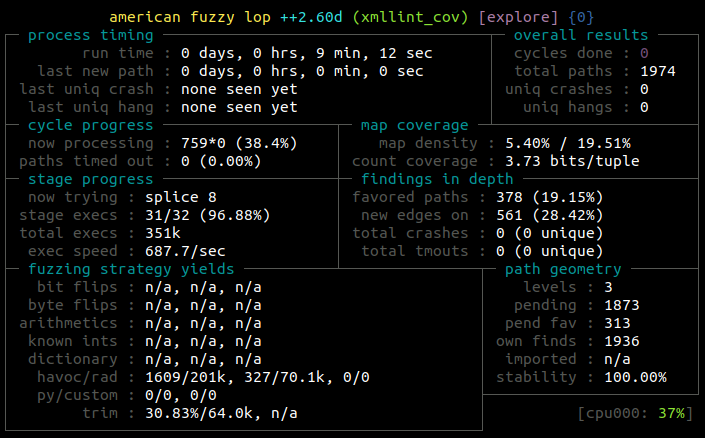
$ ~/AFLplusplus/afl-fuzz -i in/ -o out -- ./xmllint_cov @@
This is AFL++ in its default configuration, without deterministic mutations and any memory limit.
Now, knowing that libxml2 is a library and so the code is reentrant, we can speedup our fuzzing process using persistent mode.
Persistent mode avoids the overhead of forking and gives a lot of speedup.
To enable it, we have to choose a reentrant routine and set up a persistent loop patching the code.
diff --git a/xmllint.c b/xmllint.c
index 735d951d..64725e9c 100644
--- a/xmllint.c
+++ b/xmllint.c
@@ -3102,8 +3102,19 @@ static void deregisterNode(xmlNodePtr node)
     nbregister--;
 }

+int main(int argc, char** argv) {
+
+  if (argc < 2) return 1;
+
+  while (__AFL_LOOP(10000))
+    parseAndPrintFile(argv[1], NULL);
+
+  return 0;
+
+}
+
 int
-main(int argc, char **argv) {
+old_main(int argc, char **argv) {
     int i, acount;
     int files = 0;
     int version = 0;
In this case, I choose parseAndPrintFile, the main parsing routine called from the xmllint main. As you can see, I created a new main function that loops around that function.
__AFL_LOOP is the way that we have to tell AFL++ that we want persistent mode. Each fuzzing iteration, instead of to fork and re-execute the target with a different input, is just an execution of this loop.
The number 10000 tells that after 10000 runs with fuzzed inputs generated by AFL++ the harness has to fork and reset the state of the target. This is useful when the fuzzed routine is reentrant but, for example, has memory leaks and so we want to restore the target after a fixed number of executions to avoid filling the heap with useless allocated memory.
To build it, just remove the previously compiled xmllint and recompile it.
$ cd ..
$ rm xmllint
$ make CC=~/AFLplusplus/afl-clang-fast CXX=~/AFLplusplus/afl-clang-fast++ LD=~/AFLplusplus/afl-clang-fast
$ cp xmllint fuzz/xmllint_persistent
Now restart the fuzzer
$ cd fuzz
$ ~/AFLplusplus/afl-fuzz -i in/ -o out -- ./xmllint_persistent @@
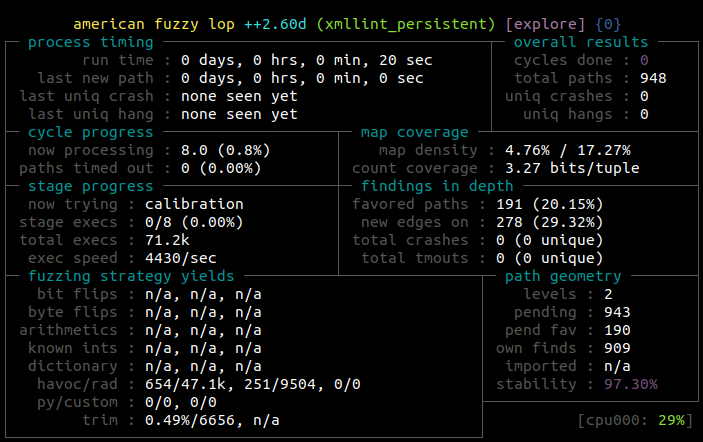
As you can see, the speedup is impressive.
Now we’ll fuzz xmllint using the binary-only instrumentation with QEMU.
We will act as if we don’t have the source code and therefore we will not patch anything in the source.
Firstly, build an uninstrumented binary. Remind to revert the applied patch for LLVM persistent before proceed.
$ cd ...
$ make clean
$ make
$ cp xmllint fuzz/
To fuzz it in the simple fork-based fashion under QEMU, just add the -Q flag to afl-fuzz.
$ cd fuzz
$ ~/AFLplusplus/afl-fuzz -i in/ -o out -Q -- ./xmllint @@
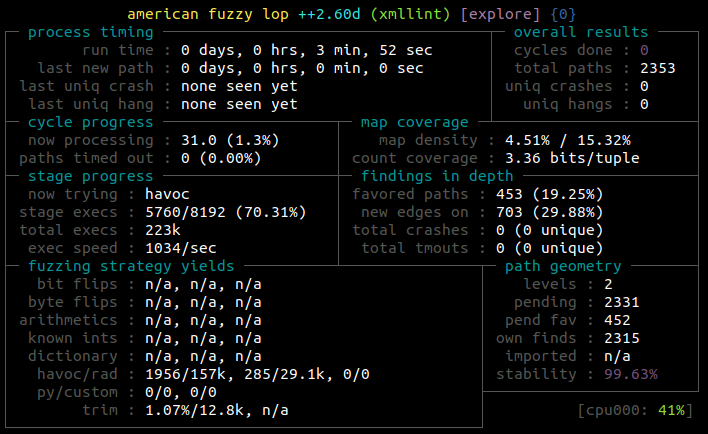
You’ve probably noticed that the speed is faster than the LLVM fork-based fuzzing. This is because we used ASan+UBSan in the previous steps based on LLVM (so a 2x slowdown in average).
Note that so the slowdown of QEMU is circa 2x in this specific case, quite good.
But what if we want the speed of persistent mode for a closed source binary?
No pain, there is QEMU persistent mode, a new feature introduced in AFL++.
There are two possibilities in persistent QEMU, loop around a function (like WinAFL) or loop around a specific portion of code.
In this tutorial, we will go for the easy path, we will loop around parseAndPrintFile.
Firstly, locate the address of the function:
$ nm xmllint | grep parseAndPrintFile
0000000000019be0 t parseAndPrintFile
The binary is position independent and QEMU persistent needs the real addresses, not the offsets. Fortunately, QEMU loads PIE executables at a fixed address, 0x4000000000 for x86_64.
We can check it using AFL_QEMU_DEBUG_MAPS. You don’t need this step if your binary is not PIE.
$ AFL_QEMU_DEBUG_MAPS=1 ~/AFLplusplus/afl-qemu-trace ./xmllint -
4000000000-400013e000 r-xp 00000000 103:06 18676576                      /home/andrea/libxml2/fuzz/xmllint
400013e000-400033e000 ---p 00000000 00:00 0
400033e000-4000346000 r--p 0013e000 103:06 18676576                      /home/andrea/libxml2/fuzz/xmllint
4000346000-4000347000 rw-p 00146000 103:06 18676576                      /home/andrea/libxml2/fuzz/xmllint
4000347000-4000355000 rw-p 00000000 00:00 0
...
Now, we set the address of the function that has to loop
$ export AFL_QEMU_PERSISTENT_ADDR=0x4000019be0
We are on x86_64 and the parameters are passed in the registers. When, at the end of the function, we return to the starting address, the registers are clobbered so we don’t have anymore the pointer to the filename in rdi.
To avoid that, we can save and restore the state of the general-purpose registers at each iteration setting AFL_QEMU_PERSISTENT_GPR.
$ export AFL_QEMU_PERSISTENT_GPR=1
Here we go, rerun the previous afl-fuzz command:
$ ~/AFLplusplus/afl-fuzz -i in/ -o out -Q -- ./xmllint @@
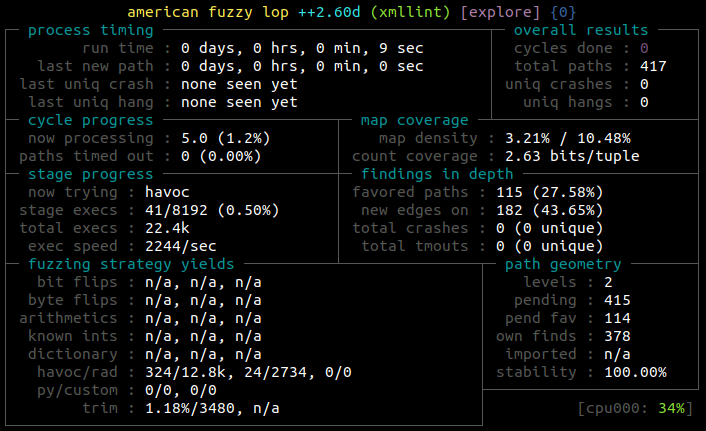
As for persistent LLVM, the speedup is incredible.
Enjoy AFL++, stay tuned for other beginners tutorial of this kind in the future.
Andrea.